
Training at Home: Building the perfect home gym
By: Mike Collette (Owner of Prototype Training Systems)
It may look like the next phase of COVID-19 is upon us. Several companies have created vaccines and the first batch is being delivered this week.
Even with a potential solution being here really soon, the holidays are only a couple of weeks away which many are predicting for another surge of cases and potential shutdowns.
Here in Massachusetts, Governor Baker recently implemented a statewide roll back and put additional restrictions in place for fitness businesses, restaurants, and social gatherings. Several states have taken a more aggressive approach with mandatory shutdowns and closings of certain businesses, so it’s almost inevitable that Massachusetts will shut down again at some point.
As the famous saying goes: “Prepare for the best, prepare for the worst and expect the unexpected”, we have to take this approach as we move forward with COVID-19.
With that being said, we have created a 3 part blog series to give you the information you need so you can keep your fitness the highest priority during another potential shutdown.
In part 1 of our Training at Home Series, we are going to discuss building the PERFECT home gym, what the essentials are, how to do it on a budget and how much space you really need to get a workout in! So whether you are doing personal training sessions from home, CrossFit, or Group classes from home OR you’re just working out on your own, we got you!
Where is all the fitness equipment?!
Prior to the coronavirus pandemic, most at home exercise equipment had more dust than sweaty fingerprints on them! Since the pandemic, that fitness equipment you may have should’ve gotten more usage (well, I hope!) and for those that needed it, well, buying anything has been an issue.
Due to the global pandemic, the demand has been extremely high for fitness equipment. It makes sense; gyms are shut down, not everyone is comfortable going into the gyms that are open, and more people are exercising from home. However, the global supply chains and manufacturing of that equipment has been severely impacted. The manufacturing can’t meet the demand and the supply of much of the equipment comes from overseas which has been held up from shipping. So, building your perfect quarantine gym may not have as easy as you hoped.
The good news is that more equipment is becoming available and you don’t necessarily have to wait 6 months to get it (like you might have to wait for a couch!). So building your perfect at-home gym can happen so let’s talk about how you’re going to do it!
Space and Storage: What are you working with?
When creating your vision for where you’re going to train and get your workouts in, you need to understand the space you have available.
The most common places people are going to set up a home gym is going to be in their garage or their basement. If you plan on setting up a training space somewhere else, don’t worry, this all applies!
First, take a measurement of your space (or check the floor plans/blueprints of your house for exact measurements) to determine how much room you have and where you are going to do the majority of your workouts. For most people, you really don’t need more than 100-200 sq/ft to workout in with storage (it all depends on how much stuff you have).
On average, a two-car garage is 18 feet wide x 20 feet deep, but you don’t need all that space unless your whole family is working out at the same time! For the most part, you will need 4-6 rubber stall mats that are 4×6 feet and ¾ in thick (that’s 96-384 sq/ft total). These will run you between $40-$60 each. The best place to purchase these (if they are in stock) is tractor supply company. Most basement spaces can accommodate this as well, however, the major difference between a basement and a garage set up is the ceiling height.
A factor that is often overlooked is the ceiling clearance. To be safe, you will need at least 8 feet of ceiling height or clearance if you plan on doing anything overhead related, including pull-ups. If you don’t have this ceiling clearance, don’t worry, you can still set up space and make it work, however you will be more limited to what you can do.
*Pro-tip*-The more stuff you have, the more space you will need. Focus on the essentials and build out from there to maximize your space. I talk about that below if you want to scroll ahead!
After figuring out your workout space and how big you would like it to be, you need to look at where and how you will store your equipment.
The best practice for equipment storage is to get as much of it off the ground. Storing equipment on the wall or consolidate it in a way that your floor space isn’t impacted when you’re moving is what you need to do. If wall mounting isn’t an option, creating storage racks or purchasing multi-storage racks can make a world of difference, as long as it’s in your budget! There are a TON of DIY options to build storage for plates, dumbbells, and other equipment (see below!)
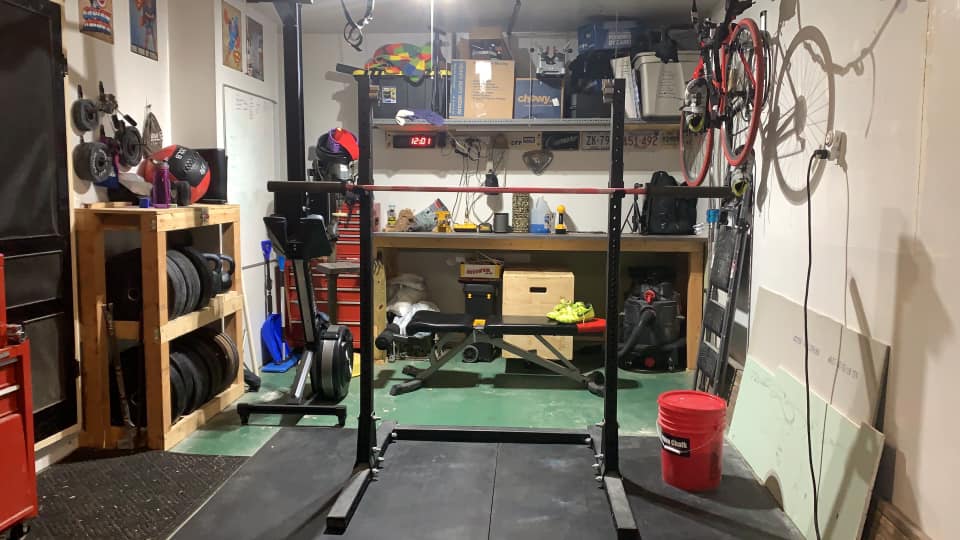
Coach Garret’s home gym has DIY plate storage racks (see left side)
If you know you will be in the need of storage, here are some wall mounted storage options to look at:
- Barbell -vertical rack holder-$32+shipping
- Got a rig? Single bar holder-$51+shipping
- Plates-vertical Plate Storage Tree-$180+shipping
- Rower- Rower Hanger-$25+shipping
- Bench-Bench Hanger-$25+shipping
- Multi-purpose storage-$1200+shipping
- Accessories-Belt and Band hanger-$30+shipping
Clearly, getting all of these storage racks can add up. In the short term, keep your equipment organized and far enough away so it doesn’t impact how you move. DIY options here are to:
- Stack bumper plates vertically
- Have a barbell? Place it in the stacked bumper plates.
- Line the edges of your space with your dumbbells or kettlebells.
- Keep as much of your equipment off the floor.
- Build storage racks from 2×4’s for plates, dumbbells, and shelving for Kettlebells.
Note the plate and dumbbell storage around the squat rack! Nice Karen and Andrew!
Budget: How much $ do you want to spend?
Speaking of budget, the next step in building out your home gym is sorting through how much money you would like to spend. The good news is that you don’t need to buy everything all at once AND if you’re handy or know someone that is, you can build several things that will save you some dough. Furthermore, you need to look at buying fitness equipment for your CrossFit home workouts as a lifelong investment. If well maintained, the equipment you buy should last a LONG time, so make sure you take care of it!
Below I broke down a few budget ranges and what you could theoretically create for a home gym based on the budget. Again, you don’t need to buy everything at once, but this will give you an idea of what you would need to spend all in.
“Home gym on a Budget Package”: Less than $100
- Foam roller and lacrosse ball ($10-$15)
- If you don’t have one, get one ASAP! This is essential for warm-up, cool down and, mobility work associated with your workouts.
- Yoga mat ($10-$20)
- Check out TJ Maxx or buy at Prototype Yoga Mat
- Door mounted pull up bar ($25-$35)
- If you plan on kipping or swinging, do not do this on this bar. This should be used for strict pull-ups or strict core exercises (toe to bar, leg raises, L sits, etc).
- Multi-purpose Resistance band ($12-$20 per)
- These can be used for assisted pull-ups with your new door mount as well as resistance for warm-up drills and shoulder stability drills.
- Mini Band set ($10)
- Great for warm-ups, injury prevention and rehabilitation, and accessory strength work.
- Jump Rope ($15-$25)
- Low impact, great to implement into your cardio driven workouts.
- At Prototype, we recommend everyone buy their own jump rope and size it to their specifications.
- Yourself-$0 (no link included 😊 )
- The most underrated piece of fitness equipment is yourself. We have 100’s of bodyweight exercises and bodyweight-only home workouts that you can do without a single piece of equipment.
- Don’t underestimate the power of your own bodyweight!
If you have zero equipment at home and are on a tight budget, I created a cart on Amazon to get you all of the things I added above. I kept the cost under $100 and if you have all of these items, you can certainly tackle a variety of workouts to help you maximize your goals! Here is the link to access it!

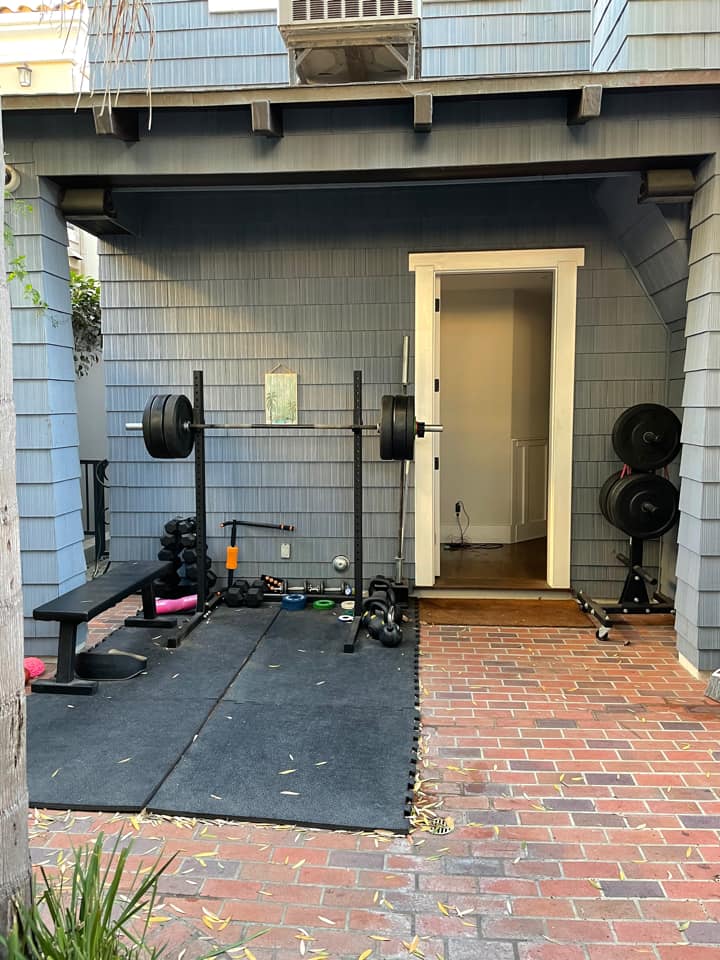
Check out AB’s set up! You don’t need a lot of equipment to still crush your workouts!
“Standard Home Gym Package”: Up to $500
- At home and on a budget package (see above)-Under $100
- Foam Roller, Jump Rope, Yoga mat, Door mounted pull up bar, Resistance band, mini band
- Kettlebell ($25-$100)
- When buying a Kettlebell, you want to choose a weight that you will use for the majority of your workouts.
- Your standard Russian Kettlebell swing weight should be what you purchase.
- Get a Kettlebell with a matte coat finish for easier grip (like the ones linked)
- Pair of Dumbbells ($30-$150+)
- Prior to COVID, the cost of dumbbells would range anywhere from .50c to $1 per pound. Now, you aren’t going to find anything less than $1-$1.50 per pound.
- When purchasing dumbbells, you want to buy them in pairs. The rubber hex dumbbells are a personal favorite because they are durable, stack/store efficiently, and are more cost-effective.
- If you are in this budget range, 1 or maybe 2 pairs of dumbbells should do the job. Just remember, the heavier they are, the more they will cost.
- When figuring out what weight you should get and if you are on a budget, you want to choose weights that are the most versatile for the majority of your workouts. For most folks, 10-40lb should be perfect.
- Slam Ball Medicine ball ($35-$80)
- You can always buy a larger Rogue medicine ball however, it will cost you almost double that of the slam ball. The slam ball can be used for your general-purpose movements such as:
- Med ball cleans
- Wall ball shots
- Goblet Squats
- Rotational exercises
- I wouldn’t recommend using the traditional Rogue Medicine balls for slams or throwing (you can, but they will eventually break) at high force.
- The best bang for your buck within this budget would be the slam ball.
- You can always buy a larger Rogue medicine ball however, it will cost you almost double that of the slam ball. The slam ball can be used for your general-purpose movements such as:
- Rogue Adjustable Plyo Box ($125) (20/24/30in)
-
- Titan 3-1 Plyo box ($60) (12/14/16 in)
- Looking for something smaller than the Rogue adjustable box? Get the Titan 3-1 Plyo for half the price. If the 20 inch is too high, this is your best option.
- Titan 3-1 Plyo box ($60) (12/14/16 in)
- This is the only piece of equipment that you will need to put together, but it takes less than 15 minutes to do so.
- This is certainly not essential as you can use a variety of alternative objects to jump or step up on (Yeti cooler, chair, step ladder, ledge/siding, etc…), however, if you are looking to build out a gym and you have space, you can fit this in the $500 budget.
- *Remember ceiling height?! If you don’t have the ceiling clearance for either of these boxes, eliminate this from your purchase.*
-
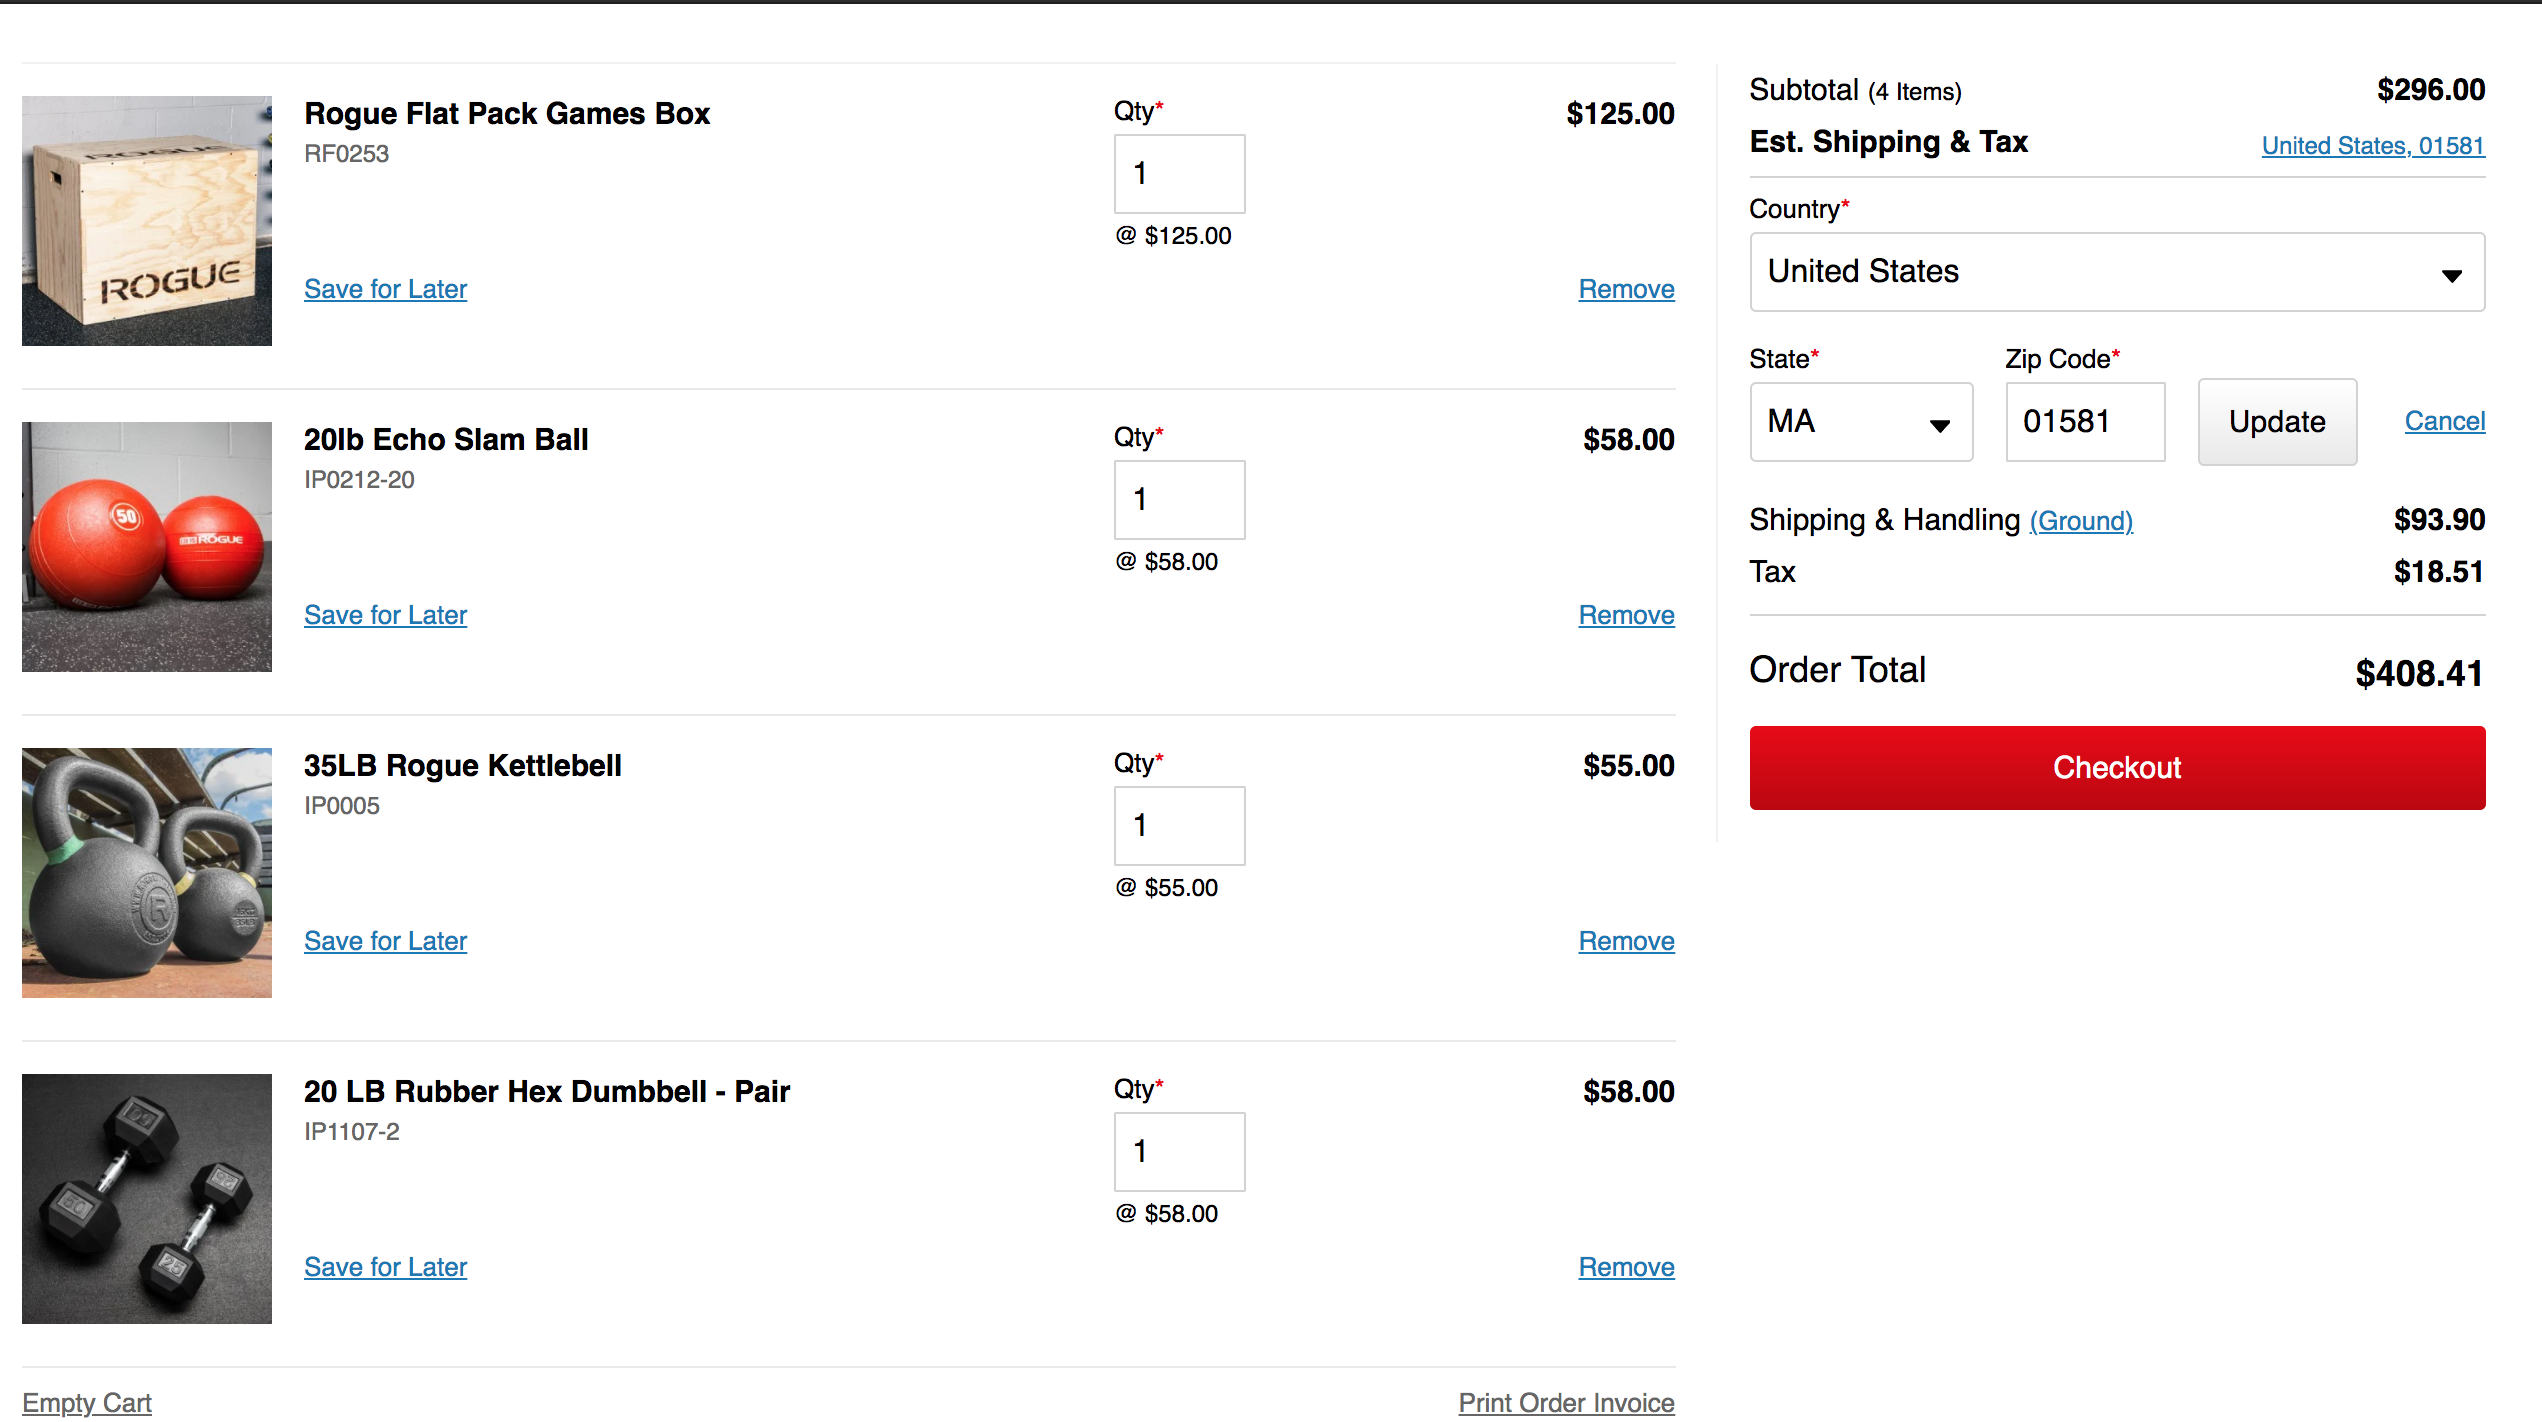
All in, plus shipping from Rogue/Titan and Amazon, you are working with around $500 in gear, which would cover 80%+ of all your workouts or training you need. If you have this in your budget, this equipment package is the standard for what you should have in your home gym, hands down!
“Home Gym Rx”: Up to $1000
- Home Gym on a budget package (see above)-Under $100
- Foam Roller, Jump Rope, Yoga mat, Door mounted pull up bar, Resistance band, mini band
- Standard Home Gym package (see above)-$500
- Kettlebell, pair of of dumbbells, slam ball/med ball, adjustable plyo box
- Barbell ($200-$250)
- If you have the room and your training calls for the use of barbells frequently, investing in a high-quality barbell will certainly be worth it.
- There are SO MANY barbell options on there that you can find it’s kind of crazy! So I’m making things easy for you and giving you a couple of options to fit the budget plan.
- If you do CrossFit workouts or functional fitness workouts, Rogue has several barbells that would fit in this budget
- Women-Bella Bar 2.0 (35lb)-$215
- This is a versatile 35lb bar with a smaller diameter so it’s easier to hold onto.
- Men-Rogue Echo Bar 2.0 (45lb)-$205
- This is a 45lb bar that can be dropped and used for versatile CrossFit workouts.
- Need something lighter? Look for the junior bars or the technique bars (15-25lb)-$150-$225
- These range in weights from 15-25lb and are great for those that aren’t looking to load a ton of weight on the barbell.
- Women-Bella Bar 2.0 (35lb)-$215
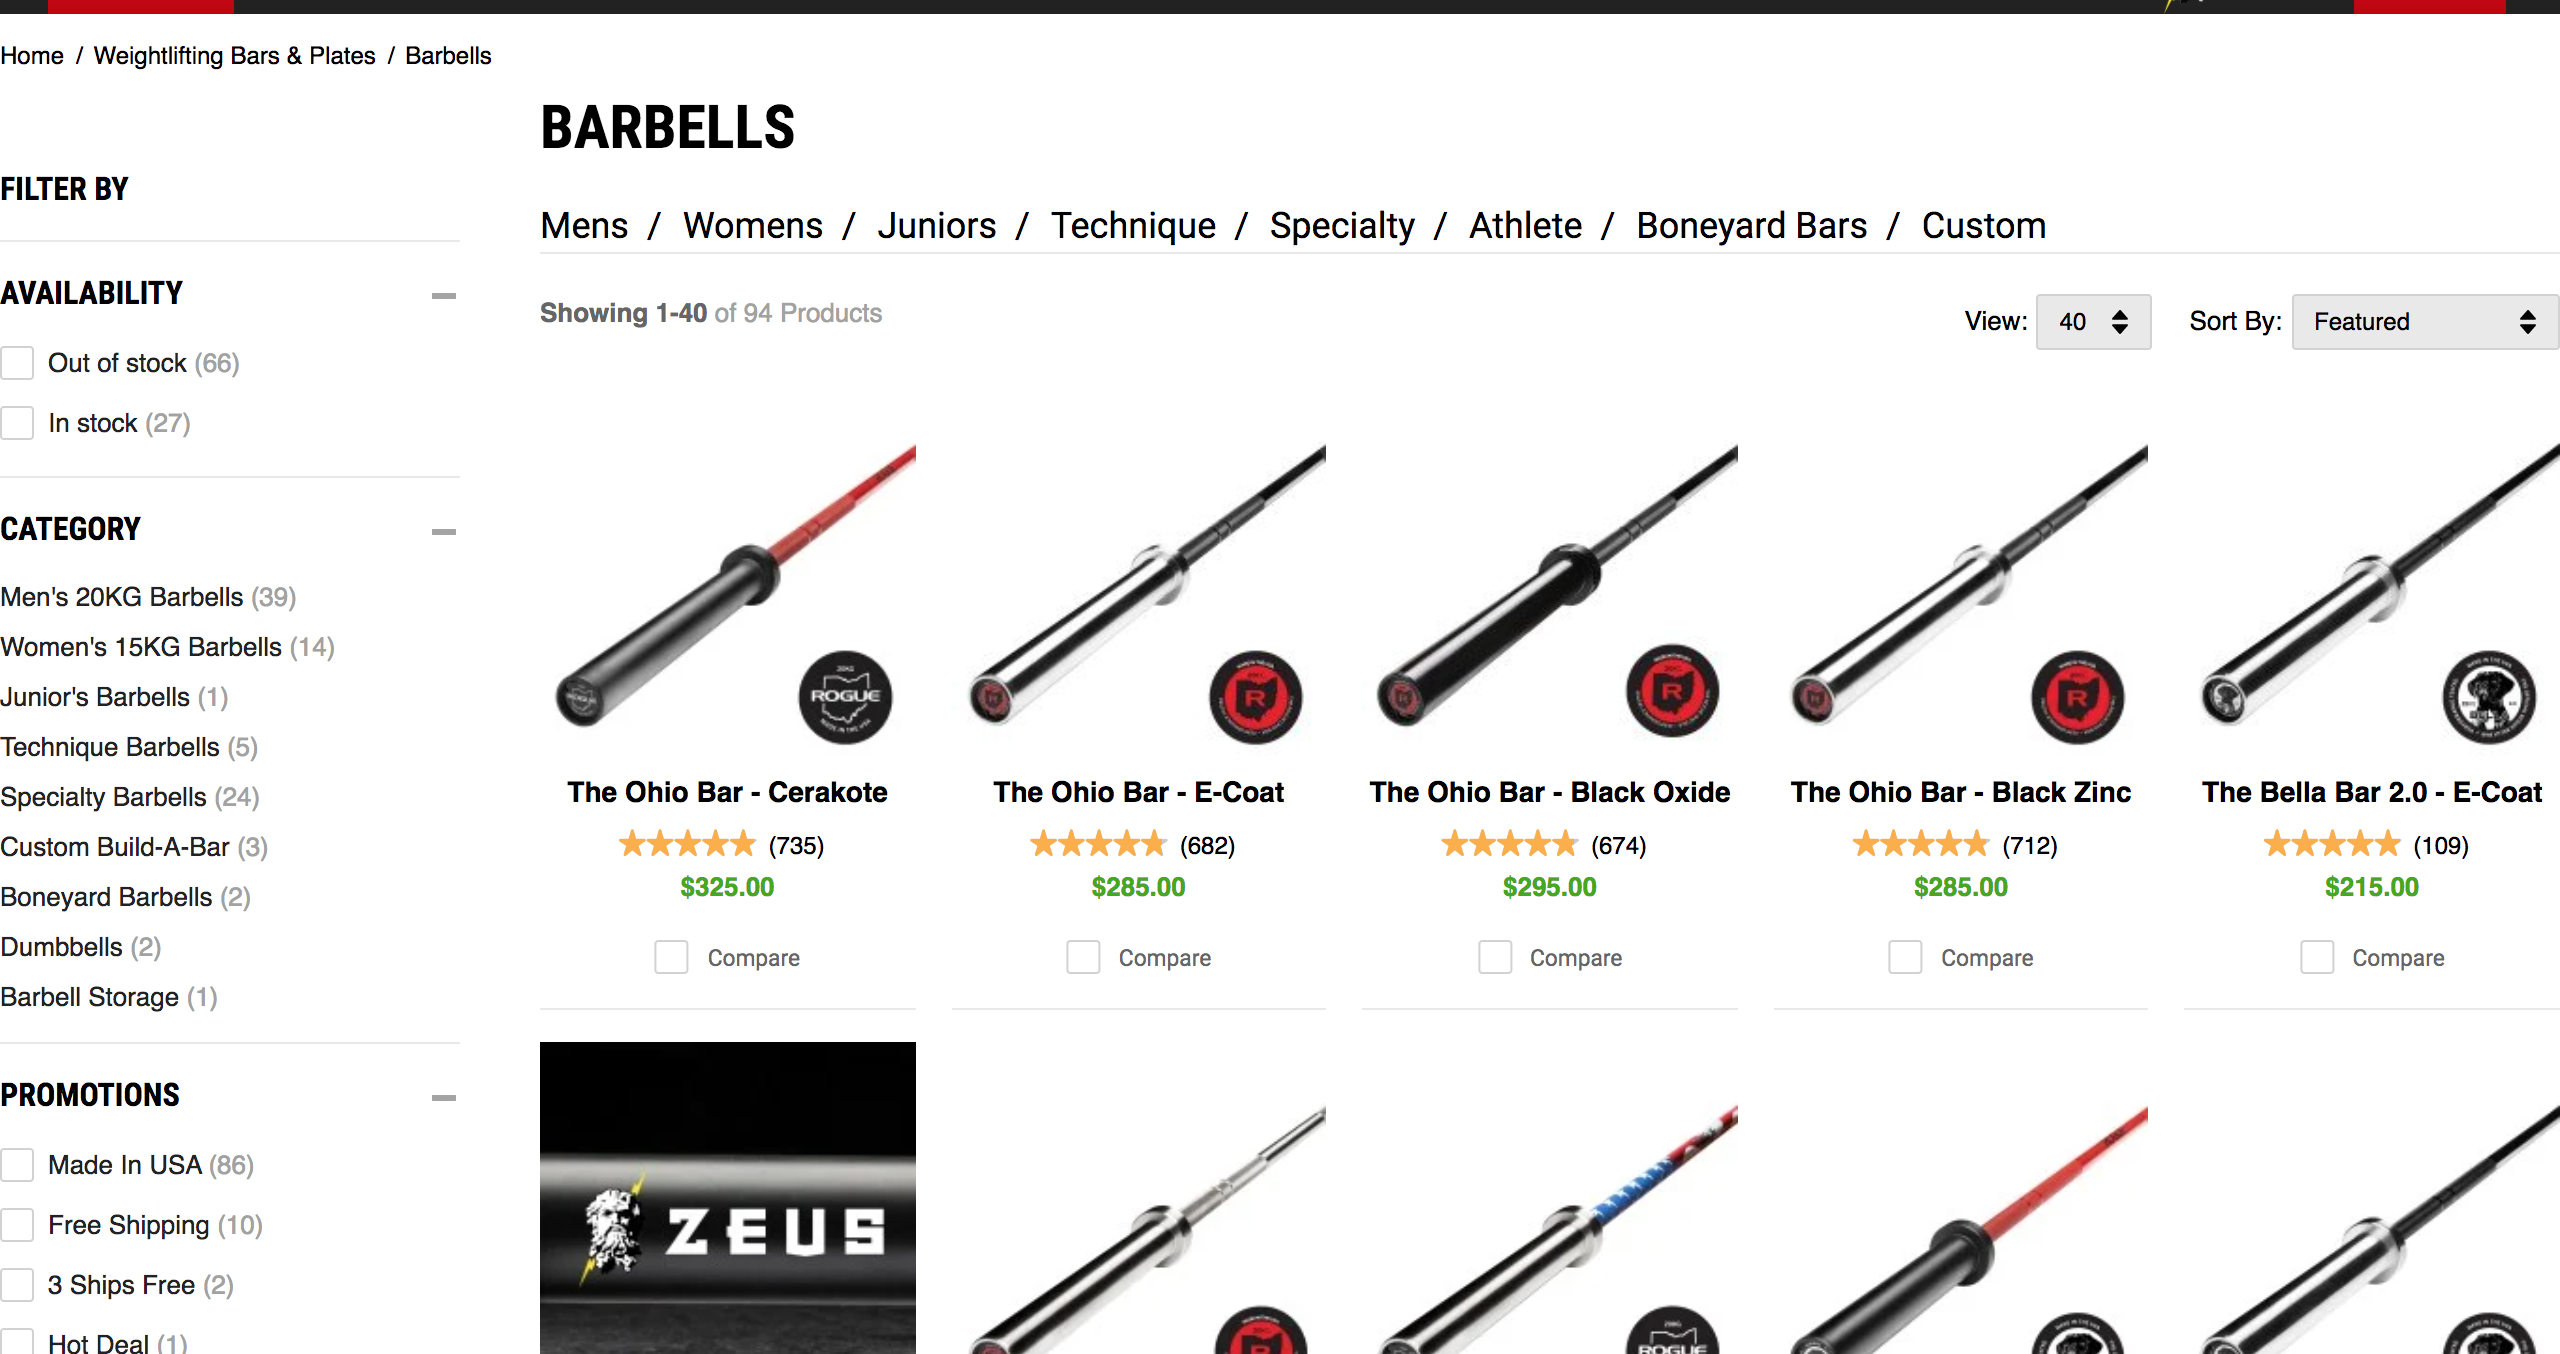
*When choosing a barbell OR any piece of equipment from Rogue (as inventory has been low) make sure to check off the IN STOCK button under AVAILABILITY on the left of your screen. This will filter the options that are available and save you some time!
- Plates ($35-$$$$)
- To fit within the under $1000 budget, you are going to need to start small and build out your plate collection!
- If you plan on taking anything off the ground, your ideal situation is to purchase some bumper plates. The reason why is that bumper plates (for the most part) are the same diameter, so whether you are deadlifting with 2, 10lb bumper plates on the ends or 2, 45lb bumper plates on the ends, the distance between you, the ground and the bar will remain the same.
- My recommendation for general fitness is buying the Rogue Hi-temp bumper plates OR Rogue HG 2.0 bumper plates. Feel free to do your due diligence and price compare to other brands (Again Faster, Sorinex, Titan, etc)
- Here are some prices and links for the Rogue Hi-Temp (most cost-effective) bumper plates.
- For most people, a pair of 10lb and 15lb ($90) will be perfect. Remember, if you have any old metal weights or find anything on Facebook marketplace, you can always add these onto your bar along with your bumper plates for heavier lifts such as deadlift variations or Olympic lifts if you need to.
- Pair of Barbell clips ($10-$15)
- If you’re getting a barbell, don’t forget to get some clips! You can also find clips on any site you buy your barbell or bumper plates.
With the addition of a barbell, bumper plates, and clips for your bar, this will run you close to an additional $500, totaling the Home Gym Rx Package to just under $1000. This package will add additional versatility to your workouts and allow you to do almost any barbell movement. This gets you roughly to 90% of all the CrossFit or functional fitness workouts you may do.
For under $1000, you can have a pretty awesome setup, but don’t worry, there’s more!
“Elite Home Gym”: More add on’s
Everyone has a budget, trust me I get it! However, if you still have money to spend on your home gym OR you already have everything I mentioned above and want to add more specific equipment, here are some additional options you may want to consider.
- Endurance and Conditioning Equipment
-
- Concept 2 Rower ($700-$1000)-BEST OPTION
- Right now, these are practically impossible to come by, but if you don’t mind getting one used, that is in good condition, check out Facebook marketplace DAILY and turn on notifications for this item.
- The great thing about the Concept 2 rower is that it separates into 2 pieces, so it’s easy to store, it’s low impact and it’s a great alternative to running when it’s freezing outside!
- Also, make sure it’s a Model D and if possible, it has a PM5 monitor!
- Concept 2 Bike Erg ($990-$1200)
- Similar to the Concept 2 Rower, the Concept 2 Bike erg is really hard to come by but it’s an amazing piece of equipment that can add a ton of variety to your workouts.
- Concept 2 Rower ($700-$1000)-BEST OPTION
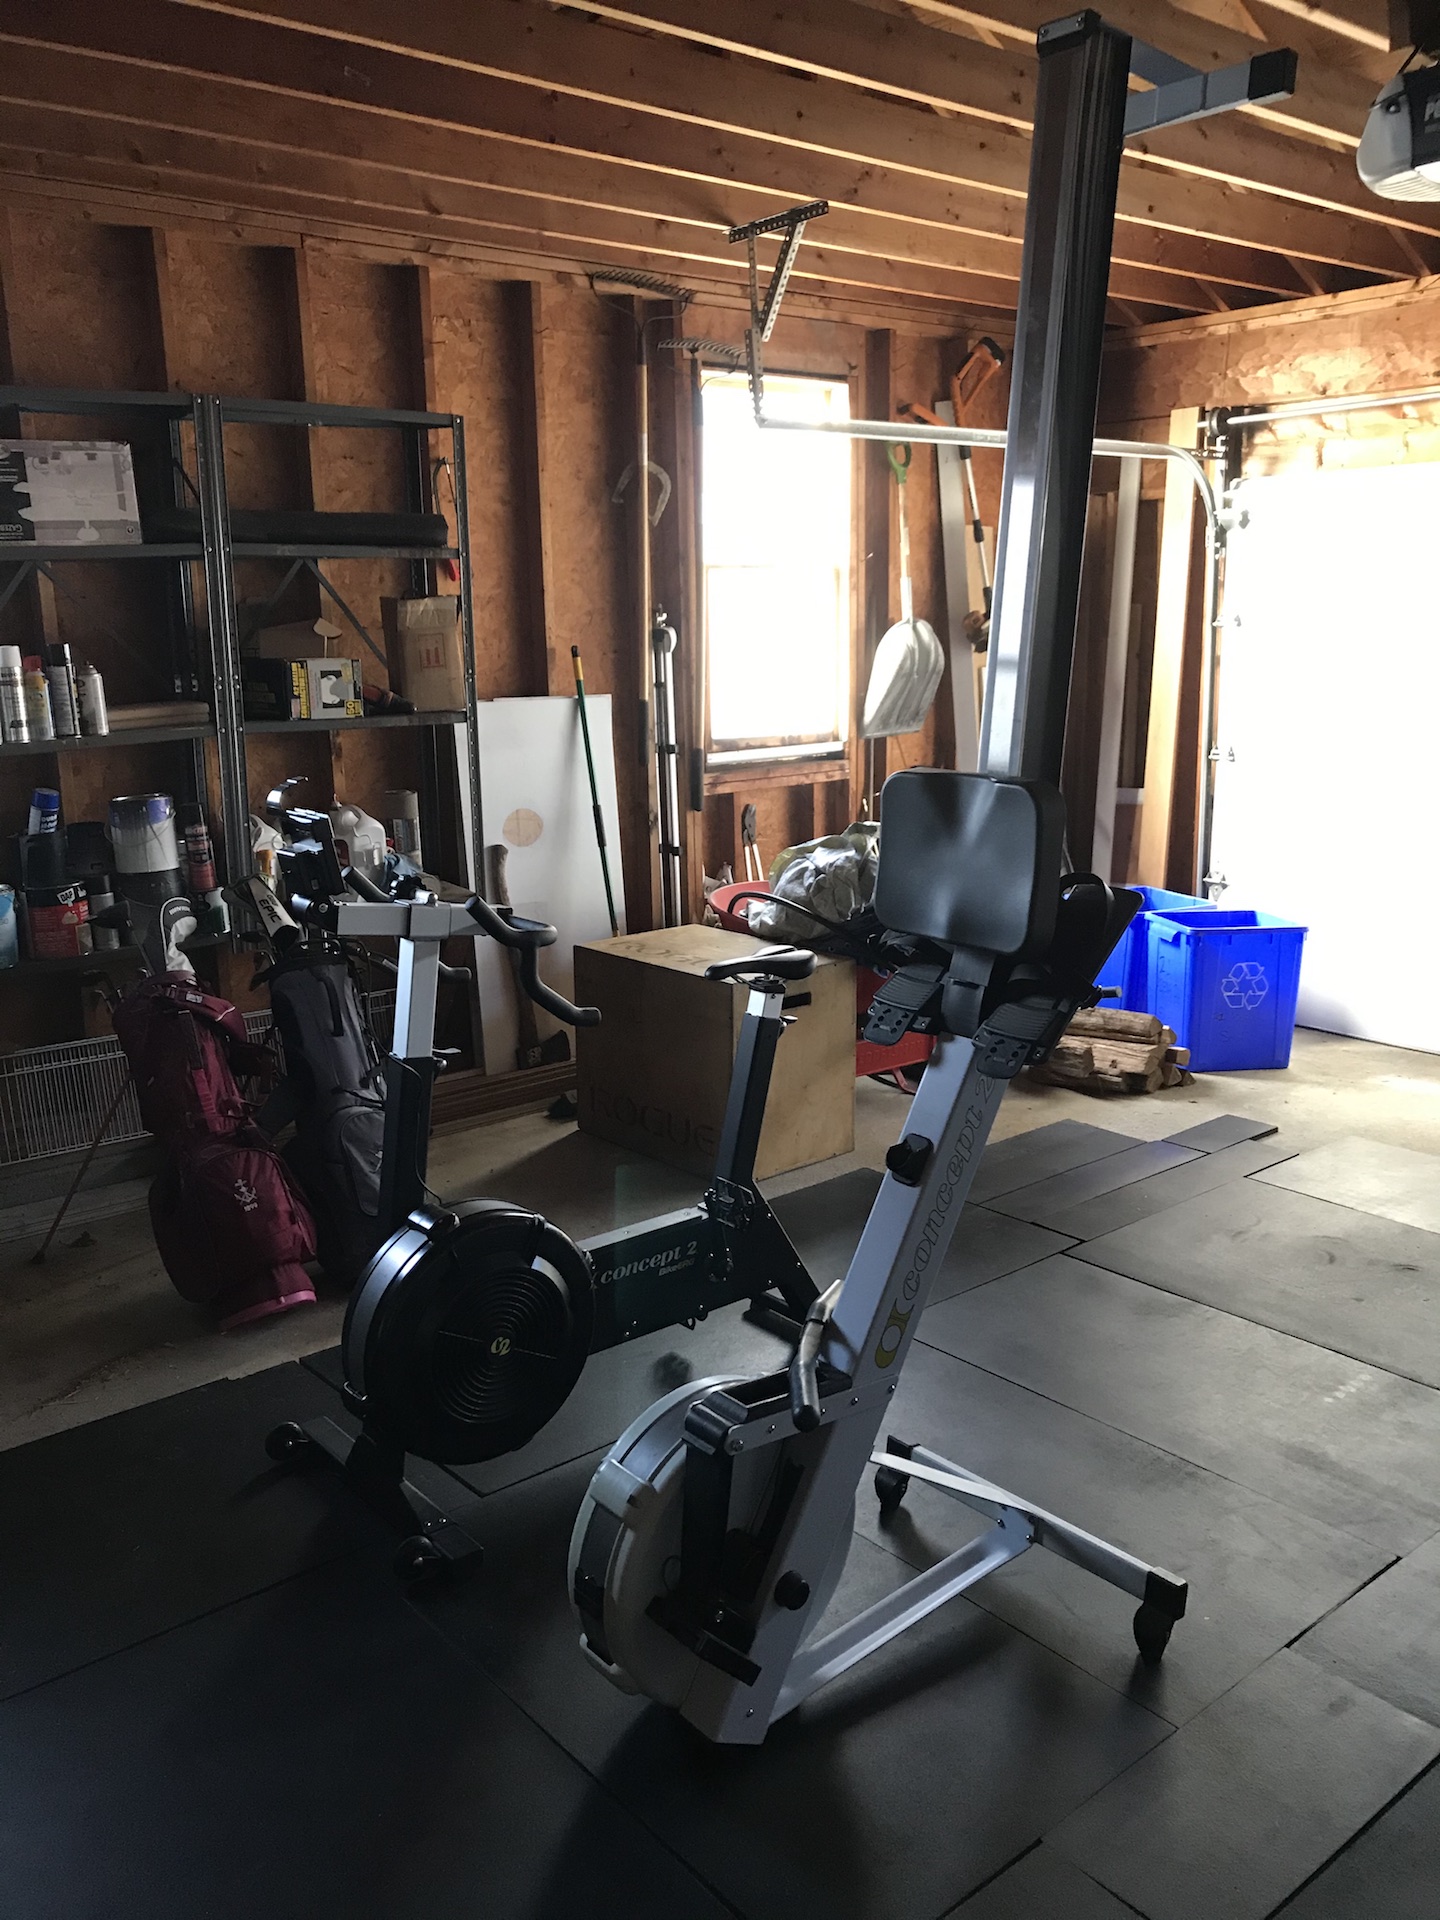
Concept 2 Bike Erg and Concept 2 Rower (stacked vertically) takes up minimal space!
-
- Assault Bike OR Rogue Echo Bike ($699-$1300)
-
-
- Unlike the Concept 2 Rower and the Concept 2 Bike erg, the assault bike or Rogue echo bike is currently available to purchase (and there are discounts).
- Arguably the least popular piece of training equipment because it is arguably the most effective piece of training equipment, this bike should be prioritized if conditioning workouts are a staple in your routine.
-
-
- Assault Bike OR Rogue Echo Bike ($699-$1300)
Overall, my recommendation would be to get on a waitlist for the Concept 2 Rower or try to purchase a used Concept 2 Rower. It will give you the most bang for your buck! Also, I didn’t mention purchasing a treadmill because I don’t believe it’s not cost-effective, storable for small spaces or a major priority to help you get more fit. If you want to run, run outside!
- Power Rack and Squat Stands
If you have space and lifting heavy is a high priority to you, adding a squat rack to your home gym should be on your list of things to add! There are several options here and I will break down what I believe the top 3 would be for the majority of home gyms.
- Wall Mounted
-
-
- Rogue Monster Lite Fold Back Squat Rack-$700-800
- If you have plan on setting up a gym in your garage but also want to fit your cars in there, this is your best option.
- This also has a pull up bar (stringer) that can be attached to it.
- Rogue Monster Lite Fold Back Squat Rack-$700-800
-
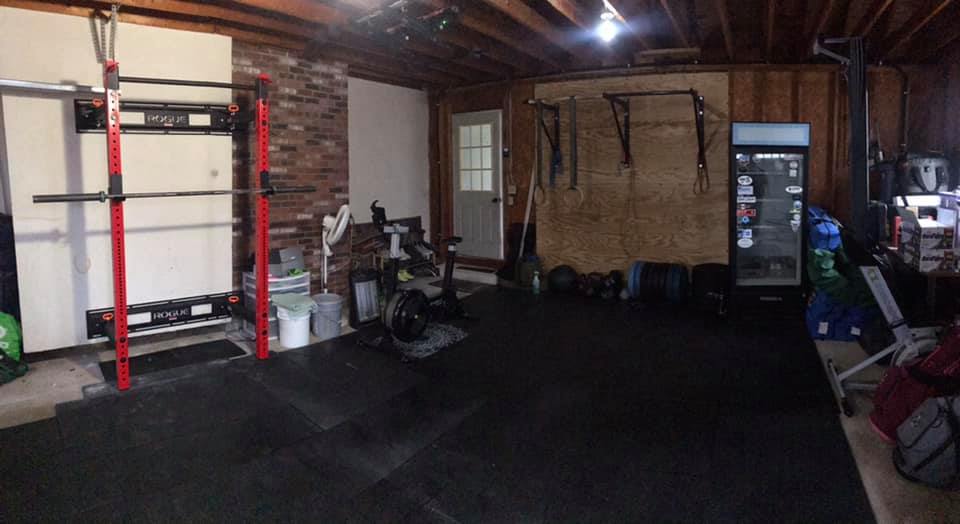
The RED rack on the left is the wall-mounted, collapsable rack that fits nicely in my garage!
- Free Standing Squat Stand
-
-
- Rogue Echo Squat Stand-$275
- This squat stand is great if you have low ceilings as it is only 70” in height.
- It can fit in a small space (less than 200 sq/ft needed).
- It’s extremely cost-effective.
- Rogue Echo Squat Stand-$275
-
- Power Rack
-
- Rogue RM Monster Rack 2.0-$2000
- If you like lifting really heavyweights, you want something extremely sturdy.
- This rack has more depth and storage than other racks, so if you have space, this is a great option.
- The options for customization and add ons are robust.
- Rogue RM Monster Rack 2.0-$2000
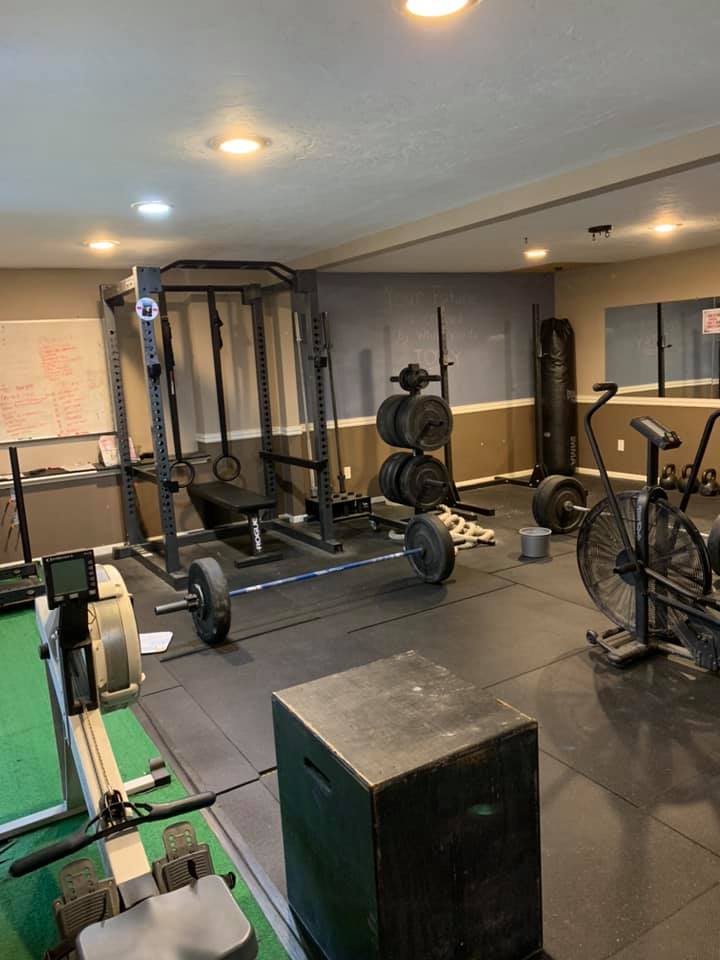
Jay and Heather have one of the most badass home gyms I’ve seen! You can see the space they have to fit that power rack!
*If you are getting a rack, adding a utility bench to your purchase would be a great additional purchase!
Accessories and additional options:
Who doesn’t like having extra fitness equipment?! Below are some additional options and accessories that won’t break the bank and can add more variety to your at home training.
- Weight Vest ($50-$200)
- Want to spice up your morning walks? Maybe train to Rx “Murph”? A weighted vest can be a great training tool and easily portable if you plan to take your training on vacation.
- Rings or TRX ($72-$180)
- If you can’t quite perform a pull up yet OR if you are battling an overhead injury, rings or the use of a TRX system can allow you to add bodyweight pulling into your routine.
- If you have a pull-up bar attachment or get the door mount for the TRX, this equipment allows you to
- Pull-Up System ($95-$150)
- As I mentioned above, if you are on a budget, a door mounted pull up bar would be a great option.
- If you do have space, flexibility, and are looking for something more sturdy, a wall-mounted pull-up system could be a great solution.
Thank you for reading through part 1 of our 3 part At Home Training series. In our next post, we are going to discuss how to get started with training at home and what you need to do!